A popular activity that has been around for decades and still tops the list of fun activities for kids is friendship bracelet making, keep reading for easy friendship bracelet instructions. The concept remains the same – make a friendship bracelet and give it to a friend to wear until it falls off. Once it falls of their wish will come true!

“Friendship Bracelets” by Vivian Evans
As well as promoting friendship, making the friendship bracelets can also have other positive effects on your child’s development. These types of fun activities for kids help to boost creativity, build up patience and give them a sense of achievement. They require concentration skills and extended use of the hands and fingers, which is essential to you child’s find motor development. It’s best to hone these fine motor skills while your child is growing, as these are skills that will eventually allow them to perform acts such as getting dressed and feeding themselves, as well as forming the basis of more complex skills such as writing and drawing. This will in turn lead to more independence and higher self-esteem.
So, let’s get started.
Easy Friendship Bracelet Instructions
What you will need:
- Embroidery Thread
- Masking Tape
- Scissors
- Beads (Optional)
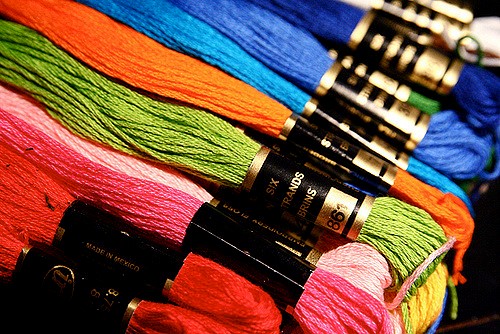
1. Friendship bracelets normally come in a variety of bright colours, so get the kids to choose a selection of embroidery threads. This could be a fun process and will get them more familiar with different colours as well as allowing them to practice their decision making skills.

“Embroidery Floss Multi-Colored 10-21-09 IMG_8048” by Steven Depolo
Next get the kids to group their thread together. The amount that they choose will depend on how thick they want the bracelet. They will them need to cut the threads at around 50cm and tie a knot in the end to serve as the starting point. Remember to supervise younger kids around scissors!
2. It’s best to secure the threads to a flat, firm surface like a table of chair using a piece of masking tape. This will make it easier to braid. Once this has all been set up, get them to sit or stand comfortably and start the braid.

“Making Friendship Bracelets” by Saskatoon Public Library
3. They will need to separate the embroidery thread into three different sections to form each strand of the braid. For the braid itself they will need to take the right section and place it over the top of the middle section. This section now becomes the middle section. Then have them take the left section and place it back over the top of the middle section so the left section becomes the middle section. This process needs to be repeated in alternations until all the thread has been braided. High levels of concentration and a steady hand are needed which are vital in helping to develop your child’s hand-eye coordination.
4. To create something a little different your child can add beads – all they need to do is thread them onto a few strands of the embroidery thread at any point of the braid. Make sure to supervise small kids when they are using small items such as beads – they might be a choking hazard.

“P13 Lake Bracelet” by InExtremiss
5. Finally, get the kids to tie a knot in the end and it’s ready to wear. And why stop at one? Get them to try different colours, lengths and styles to give to all their friends!
 Kaboutjie SA Mommy Blogs by Lynne Huysamen


Cool idea!!!
Happy 2017 for you and your family Lynne.
Hope it will be a great year.
Thanks Marisca, I know it is going to be an amazing year! I wish you and your family happiness and blessings in 2017.
Great idea i will say
Nice idea for girls they like friendship goodies they just found that one friend they are connected with. So cute